Sunday, January 31, 2016

Week 3: 2D3D - Continuing Concepting and Layers in ZBrush

This week we continued with our concepts in ZBrush. This was definitely not my favorite thing to do in ZBrush, but I can see why its important to learn.

Building an environment in Zbrush I found to be a bit difficult if the buildings are supposed to be circular or exaggerated.

What was due this week was mocking up and creating 12 concepts of something. I choose to do environment.

Here is my final verions... Below this I will go over my process:


-------------------------------------------------------------------------------------------------------

I was unable to continue the city layouts from last week, so I started over for the most part.

Instead of focusing in on the city, I wanted to build around the city and focus on depth, perception and size.

From the beginning, I took my initial landscape and sculpted four different versions of the landscape that the city could sit on.

To make the city more interesting, I created a new layer of my favorite city layout (the windmill pattern), and warped the buildings into more interesting shapes to give it a looming cartoony feel.

From there, I used the base sculpt and crated two layers to generate a total of three concepts from one layout.

I repeated the process above to get my final results below for the sculpt.

My landscapes are mostly light trees, bushes, roads and rocks, and I represented each of those roughly in the sculpt for me to give my attention to while I paint overtop of each. 


After I laid out these renders, I took them into Photoshop and added in the trees and added small details to the mountains and rocks. This is my final result.


Sunday, January 24, 2016

Week 2: 2D3D - ZBrush, Dynamesh and ZRemesher

So for week two we are learning how to concept in ZBrush. Our assignment was to either layout a character and model four different body types, or layout an environment and layout four different layouts. Since I am most interested in environments, I choose the latter.

I began by sculpting a quick flat land with apparent mountains in the background. I learned Dynamesh by using it on the landmass to keep correcting the topology.


After I was happy with the topology, we learned ZRemesher to clean up the topology even more. 


At this point, I decided to start build models of buildings that was taught on ZBrush Central. It was a great and fun technique! Since this piece is only used for a concept piece, I created five different buildings of varying sizes and shapes.


I laid out these five buildings in four different city positions according to my capstone games reference city: Kowloon. For a quick reference, Kowloon was a city near Hong Kong laid out in a square pattern and extremely crowded. Kowloon is on a desert area, but mountains and small foliage can be seen from the city. It was certainly and interesting sight to see! A huge city of stacked buildings on top of each other in the middle of no where.

Our team knows we want this layout of a city in a rectangular shape, so I worked on creating different building patterns inside the city.

To make this process easier, after attempting to use the transpose tool in ZBrush, I learned that it isn't efficient and is quite cumbersome and frustrating for what I wanted to do. At this point, I exported the landscape and the five buildings into Maya and used live trace on the landscape to quickly layout and plan new buildings and city patterns.


After finishing the four different city layouts, I took screenshots of them in their grey state.


This layout is just a generic full layout of a city.


This layout I made more circular and in the pattern of a summoning circle with a star pattern in the middle.


This pattern is a target or a rectangle. All the buildings are laid out in rectangles until the center which has a main building.


The final layout here shows a windmill pattern. This would designate a North, South, East and West part of the city with potential for parks or small ponds inside the city.

All together:


Finally, I pulled all the pictures into Photoshop and tried to color them a bit with colors that will be used. The colors should be muted, with a highlight color here and there. I did two "daylight" shots and two "night" shots.


Wednesday, January 13, 2016

2D3D: Week 1: Reposing

Well, it did not take very long for our new Semester to begin and the lessons to start!

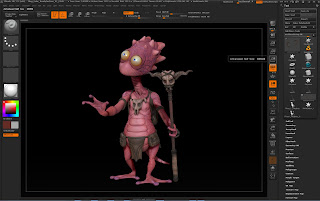
For Week 1, we have been introduced to reposing models. We were introduced to the pros and cons of two different methods...

Method 1 is using Zbrush and the transpose tool. This method was fast, but temporary. I am able to make a pose fairly quickly and fix a few errors here and there, but in order to do a separate pose, you need to change it every single time. Bummer there.

Method 2 is using Maya to create a skeleton. This process is simple, but time consuming. The good part about it, is that creating a skeleton means you can keep reposing it! So once you create that skeleton completely, you won't have to do it anymore!

There is also a final part to what we learned with reposing in ZBrush. We were introduced to the rendering process, then taking the results of the rendering process to pull them into Photoshop for touch-ups using the different channels.

Here are my results from Zbrush:

Original Pose:


Pose I created only using Transpose tool in ZBrush:


Putting all the exported Renders together to make a nice picture in Photoshop:


Final Exported Posing Image:


Here are my results from posing in Maya.. .We learned new tricks this time and I exported out a character sheet in ZBrush for this one.


I took Renders from Zbrush in both poses and cleaned up the look:


Happy New Year... and Oh, Semester Two

Whew! So break was really great! Happy New Year to everyone! It's onto Semester Two and we promptly were introduced to our next topics! :D

Here is to another great Semester and Year!